How do you know which filter in Nik Color Efex Pro 4 you should use for processing your photos? With a total of 55 filters in Color Efex Pro 4, there is a lot of filters to explore. However, here is a little help.
I have gathered 5 of the best and most powerful Nik Color Efex Pro 4 filters and how to use them to create fantastic photos.
If you would like to be in charge of whether the detail extractor filter focuses on texture or only larger objects, just change the Effect Radius drop down option. Select the “Fine” option under Effect Radius to make Color Efex Pro 4 concentrate on bringing out more texture from smaller objects.
Brilliance/Warmth
This filter is the one to use if you want more warmth or coolness in your photo. This filter gives you control over the vibrance using three sliders. The Saturation slider simply controls the saturation of the photo, no mysteries here. However, the Warmth slider will do wonders in adjusting the warmth or coolness in your image. Drag the slider to the left to add some subtle blue color which will give your image a cooler color temperature. Drag the slider to the right to add some red, to give the image warmer color temperature.
The last slider, Perceptual Saturation slider, doesn’t change the saturation directly. Instead, it increases the hue of colors and their complementary colors slightly, to make the colors look more saturated. It is a subtle effect, but can give your image that extra pop to make it stand out.
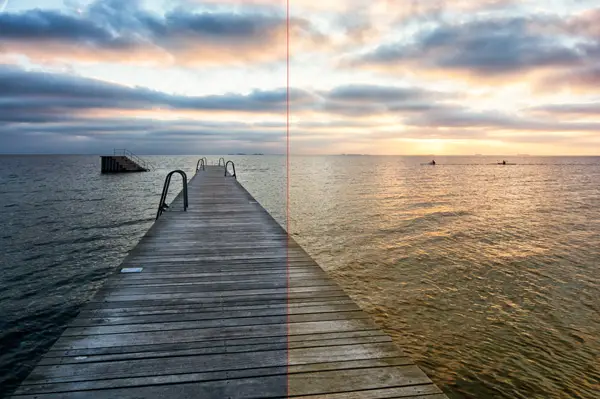
Darken/Lighten Center
Sometimes you need a little help to draw the towards the center of your image. In a program like Lightroom you can achieve this with a vignette. But this will only get you so far, as it only darkens the edge, but doesn’t give that extra punch by brightening the center. You would have to also apply the circular adjustment brush to achieve this. But the vignette would still be centered in the middle.
In Color Efex Pro 4 you can darken the edges and brighten the center plus choose exactly where on the image you want the center to be. If you composed your image using the rule of thirds, this comes in handy to ensure that you draw the eye to the exact place you want and not to the exact center of the image.


Click on the Place Center tool and then select the area of the image you want as the center.With high key photos, you might want to use this filter in the opposite way by lightening the edge while darkening the center, which is entirely possible. Just reverse the values of the Border and Center Luminosity sliders.
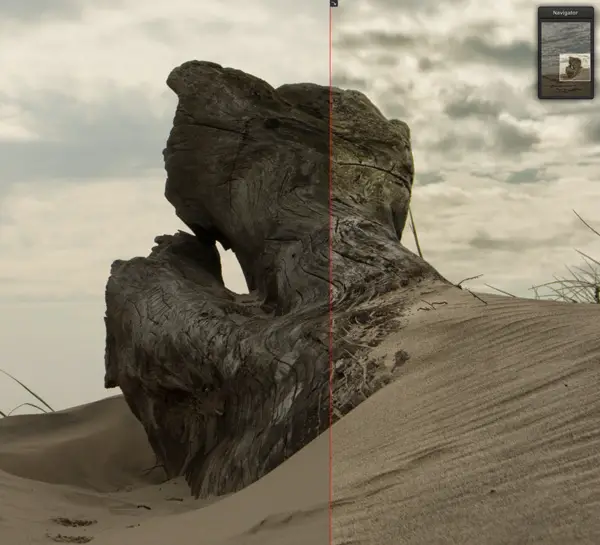
Pro Contrast
Pro Contrast is one of those filters, where you just have to trust that it does what it says it does. You can see the effect of using it, but it can be difficult to see exactly what it is doing. Anyway, the results are stunning. Pro Contrast lets you control the color and contrast of your image while keeping the details throughout the image.
Pro Contrast can detect and remove color cast, but more importantly, with the Dynamic Contrast slider Color Efex Pro automatically analyzes the image and adjusts the contrast of each object in your image based on the tonality found. This means that some areas are adjusted more because they can tolerate more contrast while other areas are adjusted on the safe side, instead of getting crunchy from too much contrast.
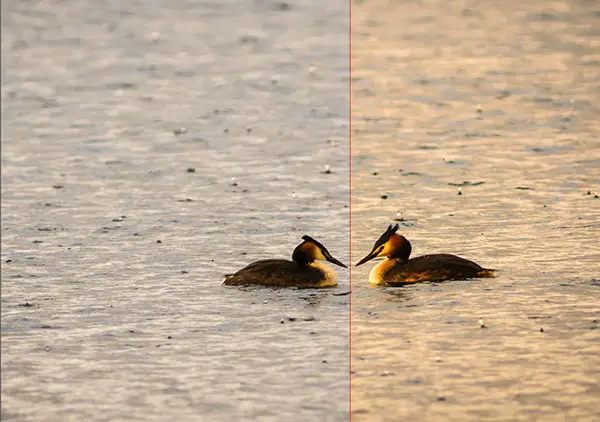
Reflector Efex
If you want to open up shadows with a warm reflector-like look, the Reflector Efex filter is the way to go. It simulates using a reflector at the location, with the difference that a reflector is limited in how far into a scene it can open up shadows. This filter is not. For instance, you can use this filter to open up very long shadows in a landscape shot and give the shadows a warm golden hour look. You can change between adding gold (warmest), soft gold and silver (neutral) reflector light to your photo. You can also control the reflector position with the Source Direction slider. You are also in charge of Light Intensity, Light Falloff and where you want the falloff to begin.

Looking to improve your Nik Color Efex Pro Workflow? Get 49 premium Nik presets and recipes for less than $10.
Limit the filter to specific areas by using control points
With each filter, you can control in which area you want to apply the filter, by using control points to create a mask. Use minus control points to limit the effect of the filter to affecting certain areas of the image. You can use plus control points to bring back the full impact of a filter which you have already limited by using the global opacity slider or the areas close to a minus control points. Minus and plus control points used together will balance the selection in a few clicks to be very precise without spending half an hour to create a precise mask with a lasso tool in Photoshop for example.
I hope the introduction to these five powerful Nik collection filters gave you a better understanding of each filter and enable you to use them to create some awesome images.
发表回复